How to Harvest and Grow Common Purslane from Seeds
- August 20, 2025
- By Oliver Denver
I’ve always found common purslane to be a fascinating plant. It’s one of those things that many people see as a weed, but I know it’s a nutritious and easy-to-grow edible. Recently, I’ve been looking into how to really get it going from seed, not just relying on the volunteer plants that pop up. It turns out, gathering and sowing common purslane seeds is pretty straightforward, and it opens up a whole new way to enjoy this versatile green. I wanted to share what I’ve learned about the whole process, from collecting those tiny seeds to having a harvest ready to eat.
Key Takeaways
- Common purslane seeds are tiny and numerous, produced in small pods that split open when mature.
- Harvesting purslane seeds involves collecting the seed pods before they fully shatter and scatter.
- Proper drying and gentle shaking of the seed pods are necessary to release the seeds for storage.
- Purslane seeds need light, warmth, and consistent moisture to germinate successfully.
- Once established, purslane is a hardy plant that tolerates heat and drought, making it easy to grow from common purslane seeds.
Common Purslane: What Is Portulaca oleracea?
Common purslane, or Portulaca oleracea as it’s known scientifically, is a fascinating plant that often gets a bad rap. Many gardeners know it as a persistent weed, but I’ve come to appreciate it for what it truly is: a nutritious and surprisingly versatile edible green. It’s a low-growing, succulent plant that practically thrives on neglect, making it a great choice for beginners or anyone looking for a low-maintenance addition to their garden.
A Bit of History and Where It Comes From
This plant has a long history, cultivated for thousands of years across various cultures. While I suspect its origins lie somewhere in North Africa or the Middle East, it’s now found pretty much everywhere, from temperate to tropical regions. It’s not uncommon to find it popping up in flower beds, fields, or even along roadsides. It’s been used for food and even medicine for ages, and it’s still grown in many parts of the world today. It’s interesting to note that it was present in North America even before European settlers arrived, suggesting indigenous peoples were already utilizing it.
Nutritional Powerhouse
What sets purslane apart is its nutritional profile. It’s unusually high in omega-3 fatty acids, which you typically find in fish or flax seeds. Plus, it’s packed with vitamins A and C, along with minerals like calcium, iron, magnesium, and potassium. It also contains antioxidants. However, it’s worth mentioning that purslane does contain oxalates, similar to spinach, so moderation is key, especially if you’re prone to kidney stones.
I used to pull this plant out of my garden beds with extreme prejudice, thinking it was just another nuisance. It wasn’t until I learned about its health benefits and culinary uses that my perspective completely changed. Now, I actively encourage it to grow.
Identifying Purslane
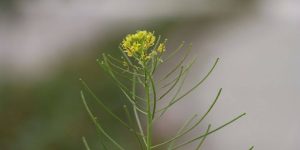
When you’re looking for purslane, keep an eye out for its distinctive features. It’s a fast-growing annual with fleshy, succulent leaves and stems. The stems are usually smooth and reddish, often lying flat on the ground, forming a mat that can spread quite a bit. Depending on how much water it gets, it might hug the soil closely or grow a bit more upright, reaching maybe 16 inches tall. The leaves are typically oblong and quite fleshy. You might even see small, yellow flowers, which are usually solitary or clustered at the ends of branches. These flowers are quite small, typically measuring just a few millimeters across, and they eventually give way to seed pods. You can find more details on its floral characteristics.
Common Names and Relatives
It goes by many names, including garden purslane, little hogweed, pusley, and wild portulaca. In other countries, it’s known as ‘pourpier’ in France and ‘verdolaga’ in Mexico. It’s part of the Portulacaceae family, which also includes ornamental plants like moss rose (Portulaca grandiflora) and wingpod purslane (Portulaca umbraticola), though those are usually grown for their flowers rather than their edible qualities. While it shares the family name, it’s quite different from plants like miner’s lettuce (Claytonia perfoliata), which are sometimes also called purslane.
Identifying Purslane
When I first started gardening, I was always a bit nervous about identifying plants. There are so many things that look similar, and I didn’t want to accidentally eat something I shouldn’t. Purslane, though, is usually pretty straightforward once you know what to look for. It’s a low-growing plant, often spreading out close to the ground. The stems can be a bit fleshy and might be green or have a reddish hue.
Leaves, Stems, and Flowers
The leaves are probably the most distinctive feature. They’re succulent, meaning they’re thick and fleshy, almost like little water balloons. This is because purslane stores water in its leaves and stems, which helps it survive in drier conditions. The leaves are usually oval or spoon-shaped, and they tend to cluster a bit at the ends of the stems or the joints. You might notice the leaf margins, or edges, can sometimes have a reddish tint.
As for the flowers, they’re small, usually about a quarter to half an inch wide. They’re typically yellow and have five petals, though sometimes you might see four. A neat thing about purslane flowers is that they tend to open only on sunny, warm days, usually in the morning and early afternoon. They pop up at the stem joints or the very tips of the branches.
Purslane vs. Spotted Spurge: Key Differences
It’s really important to be able to tell purslane apart from its look-alikes, especially spotted spurge. They often grow in the same spots, like gardens and disturbed areas. The biggest difference I’ve found is the stem. Purslane has those thick, succulent stems, while spurge stems are much thinner and can sometimes feel a bit hairy. Spurge also tends to be a bit more flimsy and less robust overall. Some varieties of spurge might have red spots or a reddish color on their leaves, which can be confusing, but the stem texture is usually the giveaway. If you’re ever unsure, just remember purslane’s plump, water-filled stems. It’s a good idea to get familiar with common garden weeds to avoid any mix-ups.
When and How to Harvest Purslane Seeds
Harvesting purslane seeds is a straightforward process, but timing is key to ensuring you collect viable seeds. I’ve found that the best time to collect them is when the small, inconspicuous seed pods at the base of the spent flowers begin to dry and turn a light brown color. This usually happens in late summer or early fall, depending on when the plants first flowered. You’ll notice the flowers themselves are quite delicate, opening only on warm, sunny days. Once they’ve finished blooming, the magic happens in those tiny pods.
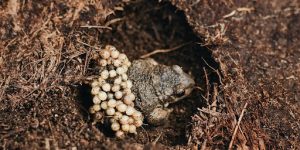
Identifying Mature Seed Pods
The seed pods are small, capsule-like structures that form where the flower once was. They are typically ovoid and have a distinct line around their middle. When they are ready for harvest, they will feel dry to the touch and have a pale, straw-like color. It’s important to collect them before they split open naturally, which can happen quite suddenly.
When to Collect
- Late Summer to Early Fall: This is the general window for seed collection.
- Observe the Plant: Look for the seed pods to turn from green to a light brown or tan.
- Dry Conditions: It’s best to collect seeds on a dry day, after any morning dew has evaporated.
How to Collect Seeds
Collecting the seeds is pretty simple. I usually wait until the plants have finished their main flowering period. Then, I gently snip off the mature seed heads, making sure to get the entire pod. It’s a good idea to bring a small paper bag or an envelope with you when you go out to collect. This way, you can place the harvested pods directly into the bag to prevent any accidental seed loss. Remember, purslane seeds are tiny, so even a small amount of jostling can cause them to scatter. If you’re looking to gather a good quantity, consider harvesting from multiple plants. You can find more information on growing purslane plants if you’re interested in cultivating more.
Purslane seeds are incredibly resilient and can remain viable in the soil for a very long time, sometimes for decades. This means that even if you miss a few during collection, the plant has a good chance of self-seeding for the following year.
Post-Harvest Seed Processing
Once I’ve collected those tiny purslane seeds, the work isn’t quite done. They need a little attention to make sure they’ll be viable for the next growing season. It’s a pretty straightforward process.
Drying the Seed Pods
After I’ve gathered the seed pods, I spread them out on a clean surface, like a tray or a piece of paper. The goal here is to let them dry out completely. This usually takes a few days, depending on how humid it is in my house. The drier the pods, the easier it will be to get the seeds out. I just keep them in a spot where there’s good air circulation, away from direct sunlight.
Shaking Out the Seeds
Once the pods feel papery and brittle, it’s time for the fun part – shaking! I take a dried pod, usually between my thumb and forefinger, and gently shake or rub it over a fine-mesh sieve or a piece of paper. The tiny seeds will fall right out. It’s kind of like a miniature harvest within a harvest. I find that a regular application of neem oil will take care of a mild case of fungus that only causes a few small spots on the stems.This preparation is the first step in the process of drying purslane.
Cleaning the Seeds
After shaking, I’ll have a mix of seeds, bits of pod, and maybe a stray bit of leaf. To get them clean, I usually use the sieve again. I gently shake the seeds through it to remove larger debris. For the really fine stuff, like dust or tiny plant matter, I might use a gentle puff of air or even just let the breeze help me out. The idea is to end up with as pure a collection of seeds as possible. It’s important to make sure they are completely dry before storing them; otherwise, they might not last.
Storing purslane seeds in a cool, dry place is key to maintaining their viability for future planting. I usually put them in small paper envelopes or glass jars, clearly labeled with the date and variety, and keep them in a storage bin in my basement.
Preparing for Sowing

Before I even think about sowing purslane seeds, I need to get the growing conditions just right. This plant is pretty forgiving, but giving it what it loves means a much better harvest for me.
Soil Considerations
Purslane isn’t too fussy about soil, which is one of the things I appreciate about it. It can grow in all sorts of places, even in cracks in the pavement. However, for the best results, I aim for soil that drains well. Heavy, wet soil can cause problems, and I’ve found that seedlings can rot if the ground stays too soggy. I usually mix in some compost when I’m preparing the bed. This gives the young plants a good start, and while purslane doesn’t need a lot of feeding, a bit of organic matter never hurts. It seems to do well in average soil, but if I have a choice, I’ll pick a spot with soil that’s a bit loamy and porous. This seems to encourage larger, juicier leaves. I’ve read that purslane can grow in various soil types, from rich muck to heavier soils, which is good to know if I’m planting it in a less-than-ideal spot.This content discusses the importance of soil phosphorus for plant establishment.
Sun Exposure Requirements
Purslane loves the sun. It’s a warm-weather plant, and the more sun it gets, the better it seems to grow. I’ve noticed that in shady spots, it grows much more slowly and stays closer to the ground. If I want those lush, spreading plants with plenty of edible leaves, I need to find a location that gets full sun for most of the day. It can even handle really high temperatures, like over 100°F, which is great for those hot summer months when other plants might be struggling. If I’m trying to encourage more flowers, I might consider a spot that gets a bit of afternoon shade, but for general leaf production, full sun is the way to go.
Location Selection
When choosing a spot for my purslane, I’m looking for a place that’s sunny and has decent drainage. It works well in vegetable gardens, herb gardens, or even as a ground cover. I’ve also had success growing it in containers, which can be a good way to manage its spread. If I’m planting it directly in the ground, I try to pick a spot where I don’t mind it potentially spreading, or I’ll be diligent about harvesting or removing flowers to prevent it from going to seed everywhere. It’s a plant that wants to grow, so containment can be a consideration. I’ve found that a hot spot, like next to a brick wall, is perfect for purslane because it loves the heat radiating from the surface.
Sowing Purslane Seeds
Deciding whether to sow purslane seeds indoors or directly outside is a key step in getting your plants started. Both methods have their advantages, and the best choice for me often depends on the weather and how quickly I want to start harvesting.
Starting Seeds Indoors
If I want a head start on the growing season, I’ll begin my purslane seeds indoors. This is especially helpful if my springs tend to be a bit chilly or unpredictable. I usually start them about two to four weeks before the last expected frost. I use small pots or seed trays filled with a light potting mix. The seeds are tiny, so I just sprinkle them on the surface and press them down gently to ensure good contact with the soil. Crucially, purslane seeds need light to germinate, so I don’t cover them. I keep the soil consistently moist and warm, ideally around 70-85°F. A heat mat can be a real game-changer here. Germination typically takes about a week to ten days. Once the seedlings have a couple of sets of true leaves, I’ll harden them off before transplanting them outside after all danger of frost has passed. This process involves gradually exposing them to outdoor conditions over a week or so.
Direct Sowing Outdoors
Alternatively, I can sow purslane seeds directly into the garden bed once the soil has warmed up sufficiently, usually after the last frost. This method is simpler as it skips the indoor starting and transplanting steps. I prepare the soil, making sure it’s well-drained, and then sprinkle the seeds on the surface, pressing them in lightly. Again, no covering is needed because of the light requirement for germination. I keep the area moist until the seeds sprout. Purslane grows quite quickly, so I can sow seeds every month or so to ensure a continuous harvest throughout the summer. This method is great for filling in gaps or for larger areas where I want purslane to spread a bit more. It’s also a good option if I’m growing it as a ground cover. For those interested in growing purslane indoors year-round, starting seeds is a good way to achieve that fresh greens throughout the year.
Key Differences and Considerations
| Feature | Indoor Sowing | Direct Outdoor Sowing |
| Timing | 2-4 weeks before last frost | After the last frost, when the soil is warm |
| Head Start | Yes, earlier harvest possible | No, starts growing when conditions are right |
| Transplanting | Required, with hardening off | Not required |
| Simplicity | More steps involved | Simpler, fewer steps |
| Control | Easier to control initial plant placement | Can be more prone to spreading naturally |
When sowing purslane seeds, remember that they are very small and require light to germinate. Pressing them onto the soil surface and keeping them consistently moist and warm is the best approach, whether you start them inside or sow them directly outside.
Seed Germination Tips
Getting purslane seeds to sprout is pretty straightforward, but there are a few things I always keep in mind to make sure I get the best results. First off, light is a big deal for these tiny seeds. When I sow them, I just press them gently into the soil surface. I don’t cover them up because they need light to kickstart their germination process. It sounds a bit odd, not covering seeds, but it works for purslane.
Soil Temperature
Temperature is another key factor. Purslane seeds like it warm. I aim for a soil temperature between 70 and 85 degrees Fahrenheit. If my seed-starting area is a bit cooler, I’ll use a heat mat underneath the seed trays. This consistent warmth speeds things up, usually getting them to sprout within 7 to 14 days. If the soil is too cool, I find they can take much longer, or sometimes not sprout at all. It’s worth checking out local temperature guides if you’re unsure about when to start seeds outdoors.
Moisture Levels
Keeping the soil consistently moist is important, but you don’t want to drown them. I usually use a spray bottle to water the seeds after sowing, and then I mist them lightly every day or so. The goal is to keep the soil surface damp, not soggy. Once the seedlings start to emerge, I ease up a bit, letting the very top layer of soil dry out slightly between waterings. This helps prevent any fungal issues, which can be a problem with tiny seedlings in consistently wet conditions.
- Light: Do not cover the seeds; they need light to germinate.
- Temperature: Aim for soil temperatures between 70–85°F (21–29°C).
- Moisture: Keep the soil consistently moist but not waterlogged.
I’ve found that using a seed-starting mix that drains well really helps manage moisture. It prevents the soil from staying too wet, which is exactly what purslane seeds need to get going without problems.
Seedling Care
Once your purslane seedlings have developed a couple of sets of true leaves, it’s time to think about giving them a bit more space. This is a pretty forgiving plant, so I don’t usually stress too much about it, but giving them room helps them grow strong.
Thinning Your Seedlings
If you sowed your seeds densely, you’ll likely have more seedlings than you need. I usually wait until they have their first set of true leaves before I thin. Gently pull out the weaker-looking seedlings, leaving the strongest ones. You can even snip them off at the soil line with small scissors if you want to avoid disturbing the roots of the ones you’re keeping. The goal is to have the remaining seedlings spaced out nicely.
Spacing Guidelines
When it comes time to move them to their final spot, whether that’s a garden bed or a larger container, give them space to spread. I aim for about 8 to 12 inches between each plant. This might seem like a lot of room for such small seedlings, but purslane does spread out as it grows. Proper spacing helps with air circulation, which can prevent some issues down the line, and it just lets the plants do their thing without crowding each other.
Transplanting Your Purslane
Transplanting purslane is generally quite easy. If you started them indoors, wait until all danger of frost has passed and the soil has warmed up. I like to harden them off first, which means gradually exposing them to outdoor conditions for a week or so before planting them out. Dig a hole that’s a bit larger than the seedling’s root ball. Carefully remove the seedling from its pot, trying not to disturb the roots too much. Place it in the new hole at the same depth it was growing in its pot. Backfill with soil and water it in well. If you happen to break off a stem piece during transplanting, don’t just toss it! You can stick that piece right back into the soil, and it might just root and grow into another plant. It’s pretty amazing how easily purslane propagates. I’ve found that even small pieces can take root, which is why it’s important to remove all plant matter if you ever want to clear an area of purslane. For those growing purslane as a ground cover or food, this ability to regrow from cuttings is a real bonus, making it easy to fill in gaps or start new patches. You can find more information on collecting seeds if you want to expand your purslane patch even further.
Purslane is a plant that doesn’t mind being moved around, and it’s quite resilient. Just be gentle with the roots, and it should settle in just fine in its new home.
Growing Purslane
Purslane is a pretty forgiving plant when it comes to where it grows, but giving it the right conditions helps it thrive. I’ve found that it’s not too fussy about soil types, happily growing in everything from sandy patches to heavier clay. However, it doesn’t like sitting in soggy ground, so good drainage is key to preventing any root issues. It also tolerates a wide range of soil pH, which is a nice bonus.
When it comes to watering, purslane is quite drought-resistant because it’s a succulent and can store water. This means you don’t need to water it constantly. Overwatering can cause problems like fungal diseases. For the best flavor and leaf production, though, it does appreciate a good watering during really dry spells. A good rule of thumb I use is to stick my finger into the soil; if it feels dry up to the first knuckle, it’s probably time for a drink. Watering at the base of the plant, rather than overhead, also helps keep things healthy.
Temperature Tolerance
Purslane loves the heat. It’s a warm-weather plant through and through and does best when temperatures are consistently above 70°F. It can even handle scorching days over 100°F without breaking a sweat. If you’re growing it indoors and plan to transplant, make sure all danger of frost has passed. It really won’t do much if the weather is still cool.
Soil Types
As I mentioned, purslane isn’t picky. It can grow in many soil types, but well-draining soil is the most important factor. Sandy or loamy soils are ideal because they allow water to pass through easily. While it can grow in clay, you need to be extra sure it drains well to avoid waterlogging. The ideal soil pH is generally between 5.5 and 7.5, but it’s quite adaptable. Adding a bit of compost when planting can give it a good start, but it doesn’t need much in the way of fertilizer. Honestly, I’ve seen it grow quite happily in less-than-ideal soil, but for bigger, juicier plants, decent soil makes a difference.
Watering Needs
- Drought-Resistant: Purslane stores water in its leaves and stems, making it quite resilient during dry periods.
- Consistent Moisture for Best Growth: While it can survive drought, consistent, even moisture will result in more robust growth and better leaf quality.
- Avoid Overwatering: Too much water can lead to fungal diseases and root rot. Water only when the top inch of soil feels dry.
- Water at the Base: To further prevent fungal issues, aim water directly at the soil line, not on the foliage.
Purslane is a plant that truly shows its resilience. It’s a succulent, after all, built to handle dry conditions. But if you want the best harvest, a little bit of consistent watering during hot spells goes a long way. Just remember, soggy soil is its enemy.
I find that purslane does best when it gets plenty of sunshine. It’s a plant that thrives in full sun, and you’ll notice it grows much slower and stays closer to the ground if it’s in a shady spot. So, pick a sunny location for your purslane, and it will reward you with lots of tasty leaves. For more on how purslane grows, check out this gardening resource.
Maintenance & Pests
Purslane is a pretty tough plant, which is good news for us gardeners. It doesn’t usually get bothered by many pests or diseases, but there are a couple of things I keep an eye out for.
Purslane Blotchmine Sawfly
This one is a bit of a nuisance. The larvae of the purslane blotchmine sawfly tunnel through the leaves, leaving little black or blotchy marks. If you see these marks, you can try squishing the leaves between your fingers to get the larvae, or just remove the damaged leaves. I’ve also found that encouraging helpful insects, like parasitic wasps, can keep these sawflies in check. They seem to like them.
Portulaca Leafmining Weevil
Similar to the sawfly, the larvae of this weevil also mine through the leaves. The adult weevils can nibble on the leaves and stems, too, but the larvae do the most damage. Again, parasitic wasps are a good natural control. If I see a lot of them, I might use a targeted insecticide like Spinosad, but I try to do that at night when they’re most active.
Black Stem Rot
This is pretty much the only disease purslane really struggles with, and it’s usually a sign of overwatering or too much humidity. You’ll see black spots on the stems. If it’s just a few spots, a little neem oil usually does the trick for me. If it starts spreading to the leaves, I might use a sulfur or copper-based fungicide. It’s best to avoid getting the leaves too wet when watering to help prevent this.
Harvesting Regrowth
One of the best things about purslane is how well it regrows. After you harvest, you can snip off sections with scissors, and as long as you leave about two inches of the plant near the soil, it will keep growing. I’ve found that I can get about three harvests from each plant throughout the warm season. It’s great for continuous harvesting. If you’re looking for tips on managing garden weeds, this resource can be helpful managing garden weeds.
The key to encouraging regrowth is to avoid taking the entire plant all at once.
Harvesting for Use
Once your purslane plants are established and growing well, you’ll want to know the best way to harvest them for eating. It’s pretty straightforward. I usually find that the most tender shoots are the young ones, the ones that haven’t started to flower yet. If you’re aiming for the best flavor and texture, especially if you plan to eat them raw, picking them before they bloom is the way to go.
Timing Your Harvest
When you go out to snip your purslane, the time of day can make a difference in taste. I’ve noticed that if I harvest in the morning, the leaves tend to be a bit more tart. This is because they have more malic acid than. If you prefer a milder, sweeter flavor, try harvesting later in the day. It’s worth experimenting to see what you like best.
How to Snip and Collect
To harvest, I just grab a pair of sharp scissors and snip off the stems. It’s a good idea to have a cool spot ready for them right away, maybe a bowl with some ice or just a shady place. You can take just a few stems, and the plant will keep growing. Or, if you want to do a bigger harvest, you can cut back most of the plant. Just make sure to leave about two inches of stem and leaves near the soil. As long as it’s warm enough, the plant will regrow and give you more shoots.
Continuous Harvesting
Because purslane grows so readily, you can often get multiple harvests from the same plants throughout the season. It’s a pretty forgiving plant. If you’re out foraging or find a patch in someone else’s garden, remember to be cautious. Ornamental varieties or plants from unknown sources might have been treated with chemicals, so it’s best to avoid consuming those if you’re unsure. For the purslane I grow myself, I know it’s safe.
Harvesting purslane regularly encourages more growth, so don’t be shy about snipping off those tender tips. It’s a great way to keep the plant productive and ensure you always have fresh greens on hand.
I find that a regular application of neem oil can help with minor issues like small spots on the stems, but generally, purslane is quite resilient. If you’re looking for a good source of purslane seeds, you might check out Eden Brothers.
Step-by-Step Purslane Seed-to-Harvest Timeline
Tracking the journey of purslane from a tiny seed to a bountiful harvest is quite rewarding. It’s a straightforward process, really, but knowing the general timeline helps manage expectations and ensures success. I’ve found that paying attention to a few key stages makes all the difference.
Seed Starting to Sprout
I usually start my purslane seeds indoors about two to four weeks before the last expected frost. The seeds are quite small, so I just press them gently onto the surface of some moist potting mix. They need light to germinate, and a soil temperature between 70-85°F speeds things up. I keep them consistently moist, and typically, I see sprouts popping up within 7 to 14 days. It’s always exciting to see those first little green shoots.
Seedling Development and Transplanting
Once the seedlings have developed a set of true leaves and all danger of frost has passed, I prepare to move them outdoors. Before planting them directly into the garden, I make sure to harden them off. This involves gradually exposing them to outdoor conditions over a week, starting with a few hours in a sheltered spot and increasing their sun exposure daily. I aim to transplant them into their final sunny location, spacing them about 10 to 12 inches apart. This gives them plenty of room to spread out. If I’m direct sowing, I wait until the soil has warmed up, usually after the last frost, and the soil temperature is around 60°F. I just sprinkle the seeds on the soil surface and press them in lightly, again, making sure they have light to germinate.
Growth and First Harvest
Purslane is a fast grower, especially in warm weather. I can usually expect to start harvesting mature leaves and tender shoots about 50 days after sowing. The plant thrives in full sun and can tolerate quite high temperatures, which is great for those hot summer months. I find that harvesting regularly encourages more growth. I can snip off stems, leaving a couple of inches at the base, and the plant will regrow. This means I can often get multiple harvests from the same plant throughout the growing season. It’s a plant that keeps on giving.
Seed Production and Fall Harvest
If I want to collect seeds for the next year, I let some of the plants go to flower and develop seed pods. These pods form at the base of the leaves. Once they turn brown and dry, I know they’re ready. I carefully collect these pods, usually in late summer or early fall, before they split open and scatter the seeds themselves. Shaking the dried pods over a container helps release the tiny seeds. After collecting, I let them dry completely before storing them in a cool, dry place. This ensures I have a good supply for the following season. It’s a smart way to reduce and help prevent the spread of this plant; however, I’ve even had wild volunteers sprout in my unused containers. Those seeds just want to grow!Green Purslane is a non-GMO vegetable ready for harvest in 50 days.
Want to grow your purslane? Our guide, “Step-by-Step Purslane Seed-to-Harvest Timeline,” breaks down the whole process. You’ll learn exactly when to plant, care for, and pick your purslane. It’s easier than you think! Check out our website for the full timeline and start growing today.
Frequently Asked Questions
When should I start sowing purslane seeds?
I can start purslane seeds indoors about two to four weeks before the last frost. Then, I’ll transplant them outside after all danger of frost has passed. Alternatively, I can sow the seeds directly into the ground once the soil has warmed up, usually after the last frost.
How do I get purslane seeds to sprout?
Purslane seeds need light to sprout, so I press them gently into the soil but do not cover them. I keep the soil moist and warm, ideally between 70°F and 85°F, to help them grow.
How far apart should I space purslane seedlings?
Once the purslane seedlings have a few true leaves, I thin them out. If I started them indoors, I would space them about 10 to 12 inches apart when transplanting. If I sowed them directly outside, I thin them to about 4 to 6 inches apart.
How do I collect purslane seeds?
I can harvest purslane seeds by waiting for the seed pods to mature and dry on the plant. Once they are dry, I shake the plants over a container to collect the tiny seeds. Then, I gently clean them to remove any extra bits.
What are the best growing conditions for purslane?
Purslane loves the sun and needs at least six hours of direct sunlight each day. I find it grows best in well-drained soil. It can handle heat very well, even temperatures above 100°F.
How often should I water purslane?
I water purslane when the top inch of soil feels dry. It’s a succulent, so it doesn’t need a lot of water and can even handle dry spells. Watering at the base of the plant helps prevent fungus.
When is the best time to harvest purslane?
I can harvest purslane leaves and stems any time they look tender. For the best tangy flavor, I pick them in the morning. I can either snip off the shoots or pull up the whole plant.
What pests or diseases affect purslane?
Purslane is generally quite tough and doesn’t have many problems. However, I watch out for the purslane blotchmine sawfly, whose larvae tunnel through the leaves, and sometimes a leafminer weevil.